Guide on how to create an e-invoice
Do you know how to create an electronic invoice? For most companies, this is a challenge. There are different ways to generate an electronic invoice, in different formats, to comply with global regulations and we tell you how to do it:
First of all, you must be clear about what an electronic invoice is, since it is not a PDF invoice. In addition, there are multiple formats of electronic invoices all over the world. We tell you all about them in this article:
What is an electronic invoice?Ways to create electronic invoices
There are different ways to generate an electronic invoice:
Basic tools or structured format invoice generators
These are usually generic and basic applications that allow you to create an invoice in a single specific electronic format. As a general rule this is not sufficient, since there are multiple electronic invoice formats worldwide, so companies cannot manage all their invoices with a single tool of this type.
Another major problem is that they often do not have user-friendly interfaces. Although it is possible to generate an e-invoice, doing so requires a lot of time and effort, which makes them an impractical solution for companies that issue many invoices on a daily basis. In addition, most of these tools are not connected to invoice registration platforms, forcing manual document uploading, a tedious and error-prone process.
Specialized e-invoicing providers
A better option is to work with a specialized tool. Such solutions offer a much more complete and user-friendly solution.
On the one hand, they can generate electronic invoices in multiple formats, such as UBL, Facturae or Xrechnung. This is very important, since they allow you to generate electronic invoices for all types of customers and from different countries.
Another relevant point is that these types of tools are usually connected to a large number of platforms and networks, which makes it possible to send and register invoices in a practically automated way, without the need to upload the invoice file to each of the platforms or networks where the recipients are located.
For this reason, we want to show you how easy it is to create your electronic invoice with B2Brouter, a specialized service provider:
Steps to create an e-invoice using B2Brouter
Before you start, you must register for free. Once registered, log in to your account and create a company. All you have to do is follow the simple steps indicated by the system.
How to create a companyIn the next step, you just need to create your costumers in the Contacts section. In some cases, it is as easy as adding your customer’s identifier and B2Brouter provides you with the rest of the information (fiscal data, invoice sending method, format you need to use…).
How to create a contactCreate electronic invoices step by step
Once you create the customer to whom you want to send the invoice, access to the main menu. Click on the Income section and you will access the Commercial invoices section.
Then use the New invoice option at the top right.
On the next page, use the Contact drop-down to select the company you want to invoice to. If the selected company has departments, branches or offices available for invoicing, a different drop-down names “Organizational Unit” is activated under. If the option is not activated, you can continue without selecting any.
Lastly, use the option Continue to start adding your electronic invoice’s data.
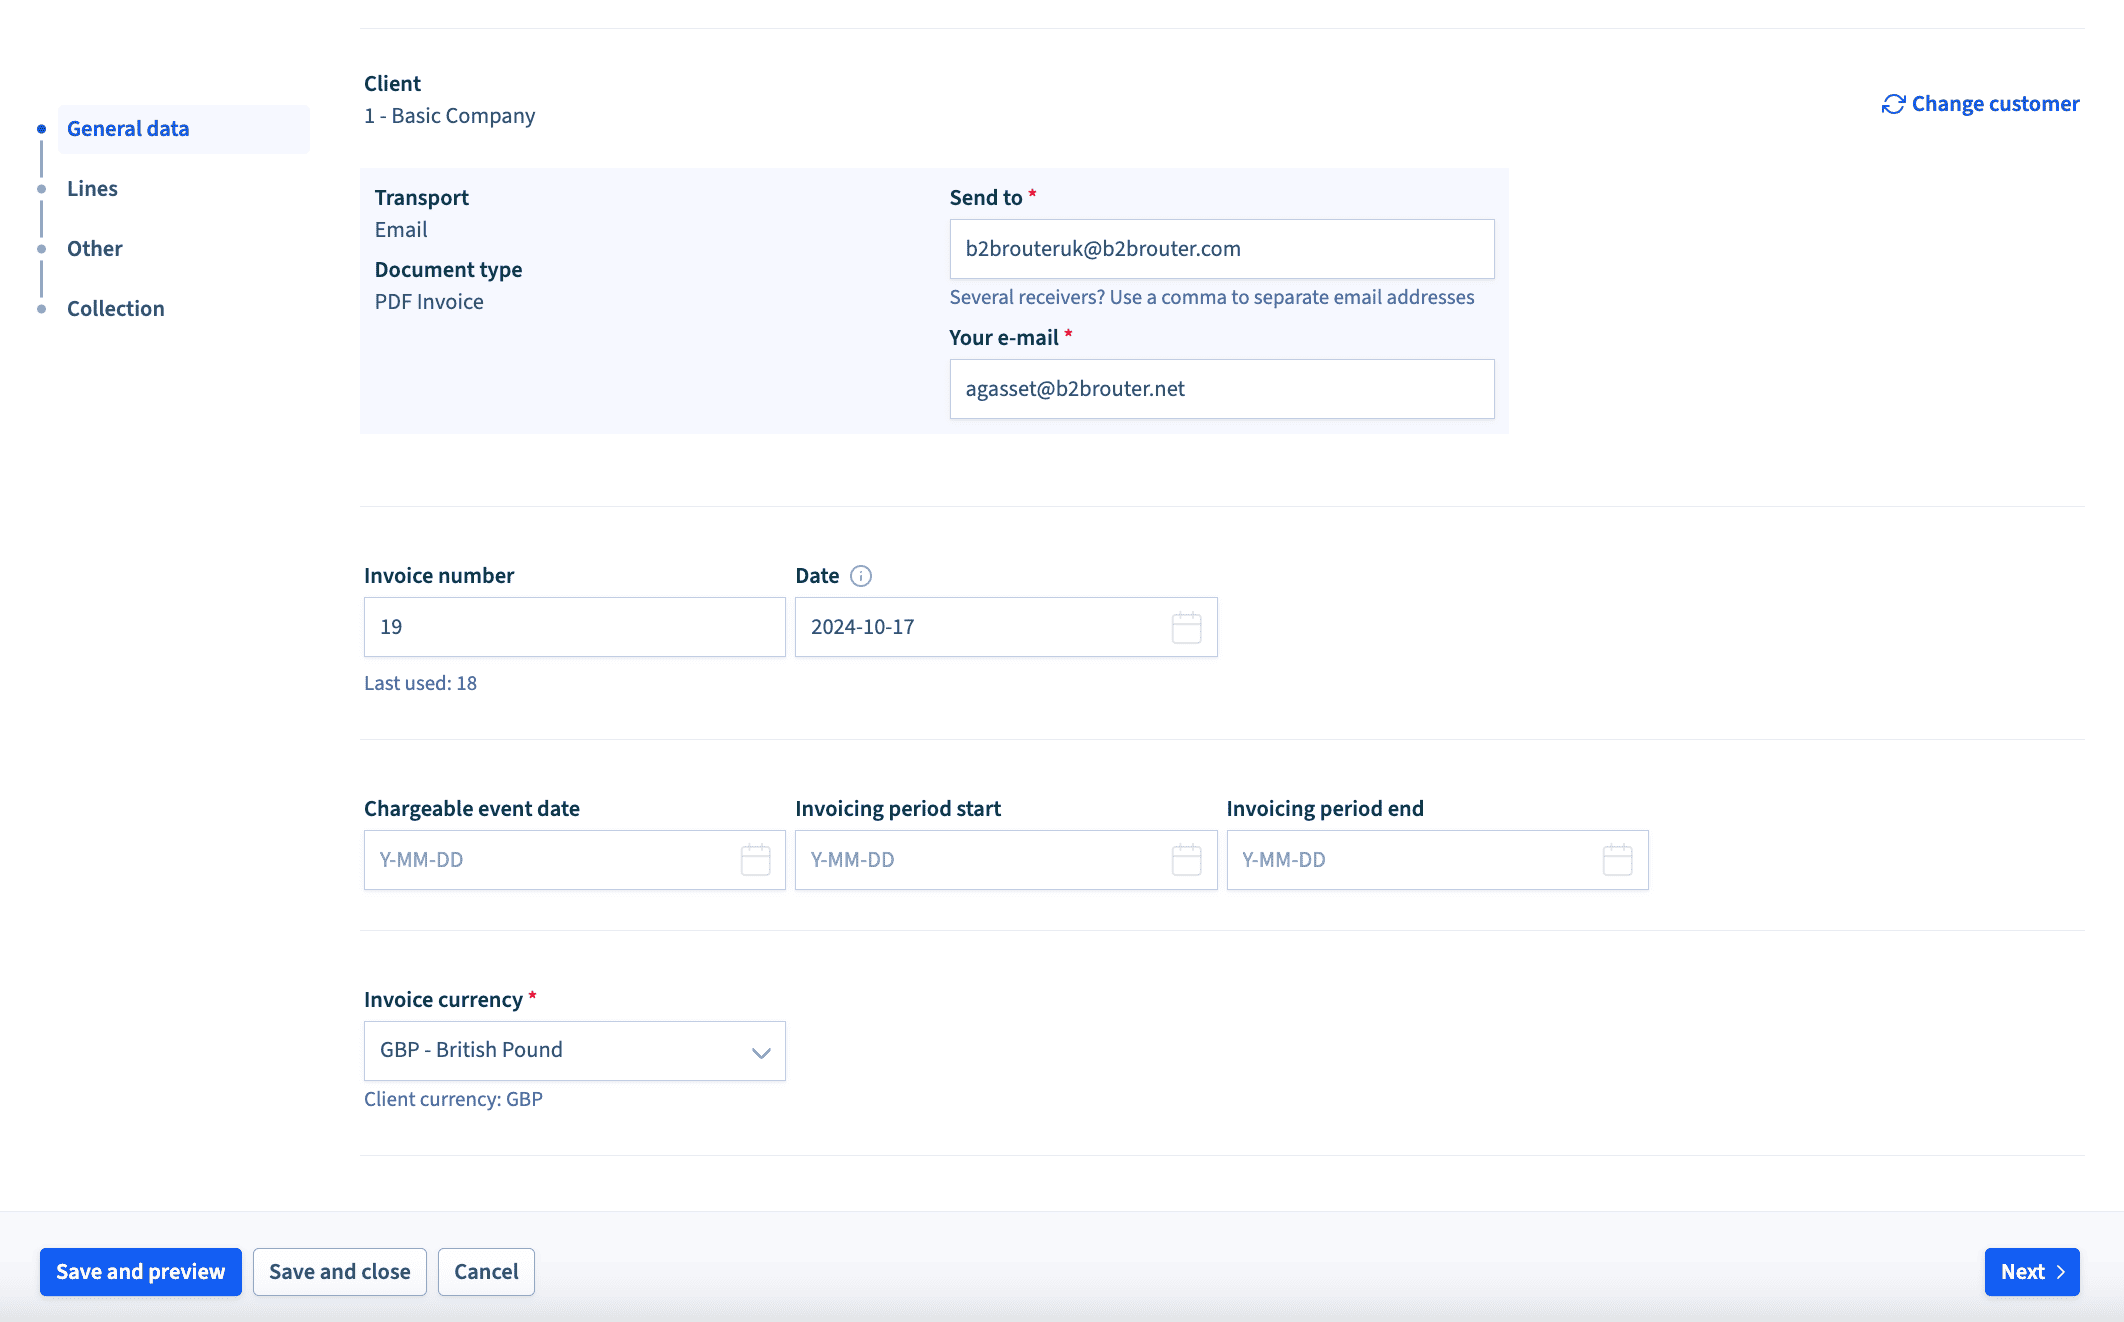
1. General data
On the next page, you can see the different sections that allow you to create the invoice. You find yourself in the General data section, where you can add:
- Invoice number
- Date
- Other information you need (file number, order number, etc.)
Once you fill in this information, go to the next section by scrolling down to the bottom of the page and using the Next button.
2. Lines
In the lines section, you only need to create the invoice lines. On the other hand, from Tax you can indicate the tax you want to apply to the invoice:
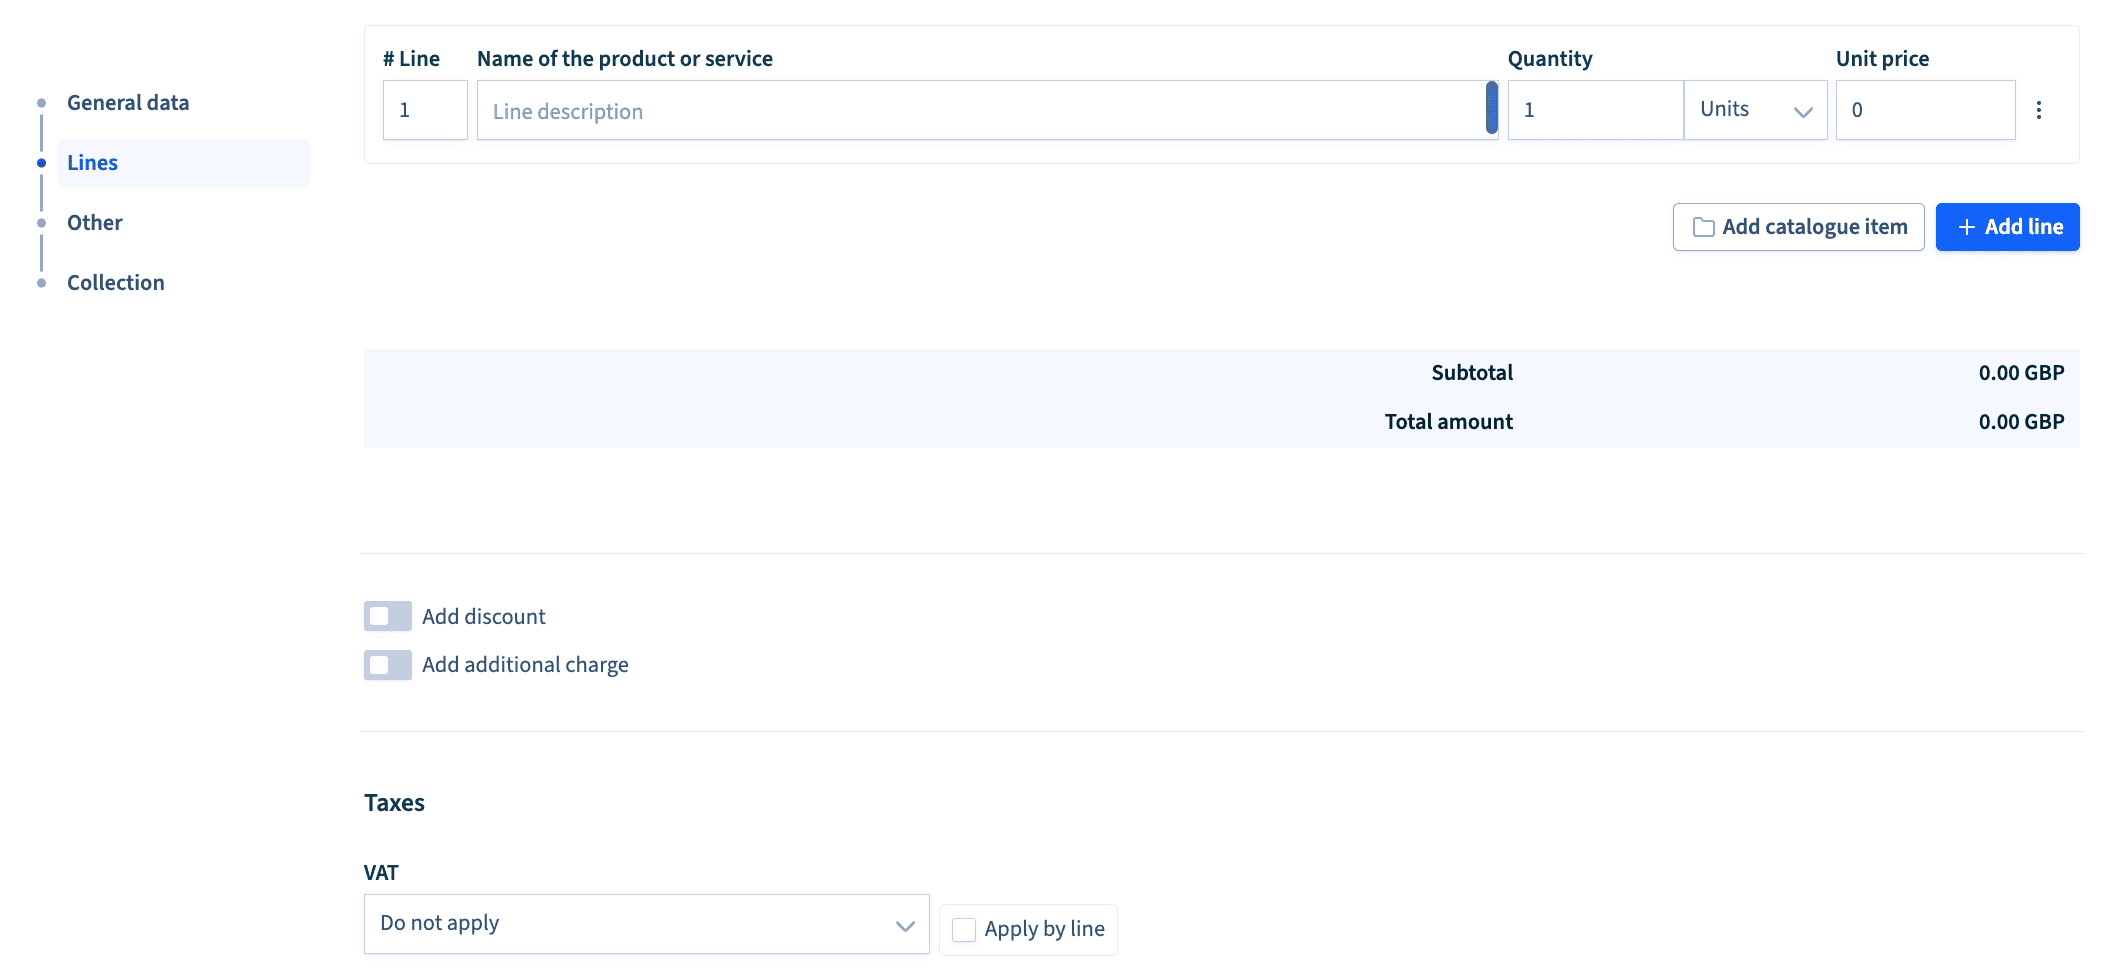
You can directly access the Collection section using the menu on the left, where you will find the different sections.
3. Collection
In the Collections section you can include the invoice collection details:
- In the Payment method dropdown select how you want to collect the invoice.
- In the Bank Account dropdown select the account where you want to receive the payment.
- In the Due Date dropdown select the due date of the invoice.

Once you have entered the data, use the Save and preview option at the bottom. This will allow you to view your created electronic invoice
You don’t need to do anything else. Once you send the electronic invoice, B2Brouter takes care of generating it in the correct format without you having to worry about the technical aspects.
How to send the electronic invoice?
Once the e-invoice has been created, you can check the document with the data provided.
To send it, you just need to use the Send button. It is as easy as that. In this case, B2Brouter also takes care of connecting and registering the invoice in the appropriate platform or network, without you having to do anything else
Do you want to control the status of your electronic invoice?
B2Brouter also provides tools to manage and track your invoices. You can see if the client has received and accepted the invoice, giving you greater control and transparency throughout the invoicing process. Additionally, the system allows you to store invoices in an organized manner, making them easier to retrieve or send in the future.
Manage e-invoices easily with B2Brouter
You can see how easy it is to create an electronic invoice with B2Brouter, but there are many reasons why working with us is a good idea:
- Manage all your invoices with all your costumers: public, private, national and international.
- Work from anywhere, it is an online tool!
- Manage the receipt of invoices.
- Work with different formats, such as XML, UBL, Facturae, Fattura PA, XRechnung…
- Connect with different networks and platforms and manage ALL your invoicing with a single platform.
- Integrate your management system or ERP with B2Brouter and work directly from your own system.
- Comply with national and international electronic invoicing regulations.
- Get ready for the new electronic invoicing regulations between private companies.
- And much more!