
Secure electronic invoicing through the Peppol network
With B2Brouter you can send electronic invoices through the Peppol network for free and receive invoices and other electronic documents thanks to the different available plans. To guarantee and offer a secure environment to companies, all users who want to send or receive electronic documents through Peppol must set up the connection and KYC (Know Your Customer).
What is KYC?
KYC (know your customer), is a process that identifies and verifies the identity of customers. This verification allows companies to create a secure environment among their customers, comply with regulations and avoid illicit actions.
This is an increasingly used practice in sectors such as banking, insurance, among others, and because of digital processes more and more sectors and organizations are implementing this type of procedures.
KYC on B2Brouter
In B2Brouter we have implemented this procedure with the purpose of creating a secure environment both for companies that want to issue invoices and for companies that want to receive invoices. In this second case it also affects those companies that receive invoices through Peppol, but work with other e-invoicing providers, since by performing KYC to all our users we ensure that no company can make fraudulent use of B2Brouter and send invoices using a false identity.
All B2Brouter users who want to send invoices or receive invoices and other electronic documents through the Peppol network, have to set up the connection and proceed with KYC before being able to send anything. This is a one-time procedure and when it has been accepted you can send and receive through Peppol without any further requirements.
How to configure the Peppol connection in B2Brouter
If you are a B2Brouter user and you want to send electronic invoices through the Peppol network, you must configure the Peppol connection from within your account to perform the KYC. To do so, you must follow these steps:
- Log in to your B2Brouter account.
- Once inside, use the gear option you will find at the top of the screen.
- A drop-down menu will appear and you will have to select the Connections option.

On the next page you will find the different connections that you can configure. If you place the mouse over the Peppol option, the New connection option will be activated at the bottom of the box. Then, use it to access the page where you can set up the Peppol connection and perform the KYC:
Select your Peppol ID:
First you will see a box with the name Peppol ID. In this section you must select the identifier you want to use in the Peppol network:
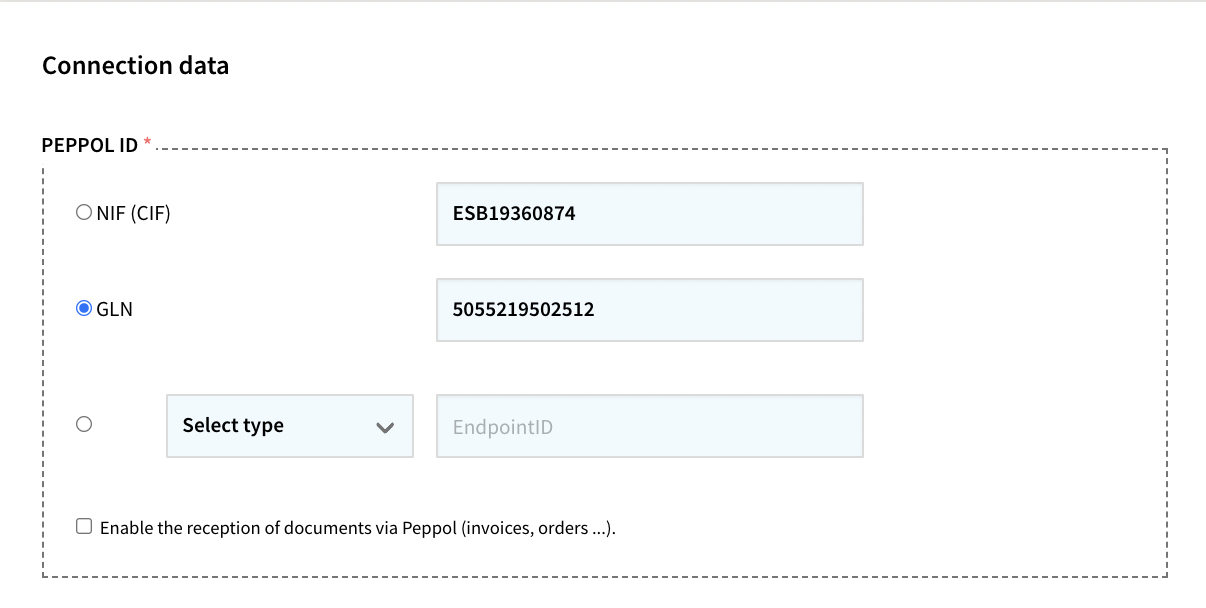
- Check the option you want to use.
- You can use your VAT Id.
- If you have another type of identifier, check the second option, select the type of identifier in the drop-down menu and add the numbering.
If you also want to receive documents via Peppol you must check the Enable receipt of documents via Peppol option (invoices, orders…).
Once you have selected your Peppol identifier you must follow 4 simple steps to proceed with the KYC.
Step 1 – Organization identification document
From this section you must upload a document that allows us to verify that you are the actual owner of the identifier you have selected as Peppol ID:
- Select the Select File option.
- Search for the file in your system.
- Upload it to B2Brouter.
If you have selected your VAT Id or another identifier, you can upload a legal ID or another supporting document such as a utility invoice (electricity, water, telephone, etc.) where we can verify the information.
Step 2 – Peppol Service Agreement
In the next step, the person acting as a representative must sign an agreement with B2Brouter and upload it in this space:
- In the option Name and surname of the organization’s representative, you must add the data of the company’s representative who will sign the document.
- In the Current position within the organization option you must fill in the position of the representative who will sign the document.
Once the data has been filled in, use the Download service agreement option. The document will be downloaded to your system and the representative must sign the document.
Step 3 – Upload signed Peppol service agreement
When the document is signed you must upload it to B2Brouter. To do this, use the Select file option that you find in this step.
Step 4 – Save this page
Finally use the Save option you will find on the right side, at the bottom the page. Our support team will receive the request, will check the attached information and will accept the request. Once accepted, you will receive an email notification and you will be able to start sending or receiving electronic documents through the Peppol network.
Register and start invoicing now!